Garmin GPS devices are widely known for their reliability and user-friendly interface. One of the most valuable features they offer is the ability to create custom waypoints. Custom waypoints allow users to mark specific locations of interest, making navigation more personalized and efficient. In this guide, we will explore how to create custom waypoints for your Garmin GPS and maximize their potential.
Understanding Custom Waypoints
Custom waypoints are specific locations saved on your GPS device. They can be points of interest, starting points for hikes, fishing spots, or any location you wish to return to or mark for future reference. Custom waypoints enhance the functionality of your Garmin GPS by allowing you to tailor your navigation experience to your needs.
Why Use Custom Waypoints?
Using custom waypoints on your Garmin GPS offers numerous advantages. Firstly, it helps in organizing your travels by marking key locations. This is particularly useful for outdoor activities such as hiking, geocaching, or boating. Secondly, it provides an efficient way to navigate back to a specific point, ensuring you never lose track of important locations. Finally, custom waypoints can save time and improve safety, as you can quickly access predefined points without manually searching for them each time.
Do you want a custom look to your GPS device? I’ll show you how to do this in this article.
Your Garmin’s GPS devices will come with over fifty different symbols to choose from. But if you’re not happy with the default choices, you have the option to create a custom waypoints symbols to suit your needs. You just need to create the symbol.
Give the file a proper name and then copy it over to the appropriate folder on your computer and your GPS device under the “custom waypoint symbols” folder. It’s that simple.
How to create custom symbols for your Garmin GPS:
The first thing you need is a program to create and edit images such as GIMP or Paint.net. Both of these are FREE to download and use! You will need to create your custom symbol(s) with the following guidelines:
- Create an image that is no larger than 32 pixels in width or height
- Create transparent pixels by setting the color to magenta (RGB= 255, 0, 255)
- If applicable, ensure no color space information is saved
- Save the file with the name 0??.bmp. You can create up to 56 custom files starting from 000.bmp up to 055.bmp.
- Be sure to save the image as a 24-bit Windows-style bitmap format (.bmp)

Basecamp custom waypoints for your Garmin GPS
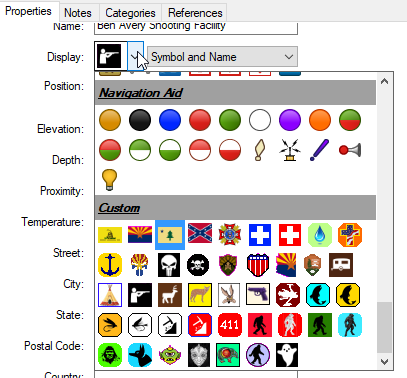
The image above is a screenshot of my available custom waypoints using Garmin’s BaseCamp. You can download my custom waypoints file below if you like. As you can see there are several cryptid symbols like dogman, sasquatch, and paranormal ones like ghosts and aliens.
I also have ones for fishing, shooting, and AZ flavored markers for historical places, etc.
Download Spike’s custom waypoints.
So I’ll leave learning to make your custom waypoints symbols up to you. It’s not that difficult and if you have trouble with your graphics software, you can Google the solution to your issue easily. But you’ll need to make two copies of that one symbol file.
The first one you save as a 3 digit.bmp file (ex: ” 012.bmp “) the other you can save that 012.bmp under a different file name. Let’s call it ” custom 12.bmp “.
The difference between both images is one file goes on your pc, and the other you will copy over to your Garmin gps device. Also be aware that your GPS device may not support custom waypoints. My Garmin GPSMAP 64 does, but my older Garmin Nuvi 50 (Garmin discontinued that model) does not.
Copying Custom Waypoints to You’re Desktop Basecamp Folder
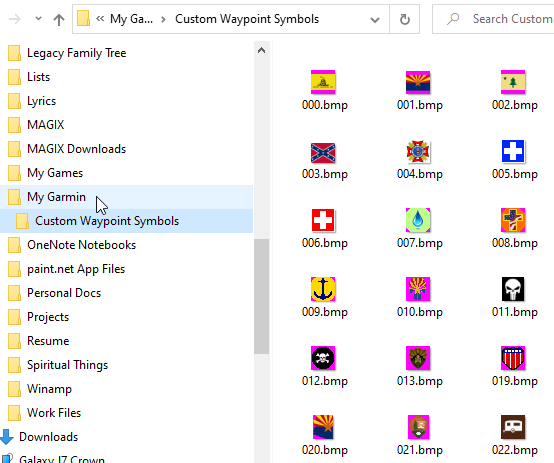
As you can see in the image below, I copied all my ###.bmp files into the File Explorer’s Documents/My Garmin/Custom Waypoint Symbols folder. These files are what show up in Basecamp once you’ve set it in the waypoints display properties under Custom.

Garmin desktop folder -File Explorer’s Documents/My Garmin/Custom Waypoint Symbols folder
Copying Custom Waypoints to You’re Garmin Device
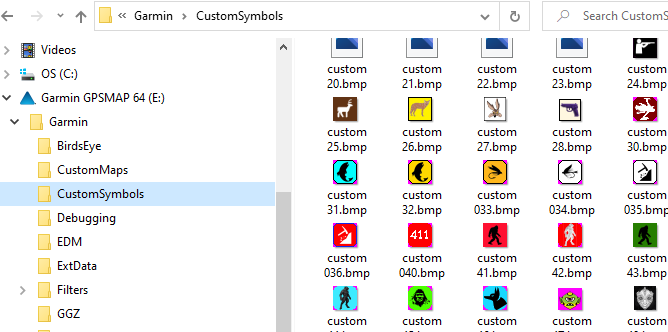
Next.., you will want to copy the ” custom ##.bmp ” file(s) onto your Garmin device. Plug in your USB cable connecting your PC and GPS device. Open up the device in File Explorer, browse to Garmin, then drill down to the CustomSymbols folder. Copy all your custom ##.bmp file into that folder. Restart your GPS unit and BAM! It’s done…

Garmin device-File Explorer, browse to Garmin, then drill down to the CustomSymbols folder
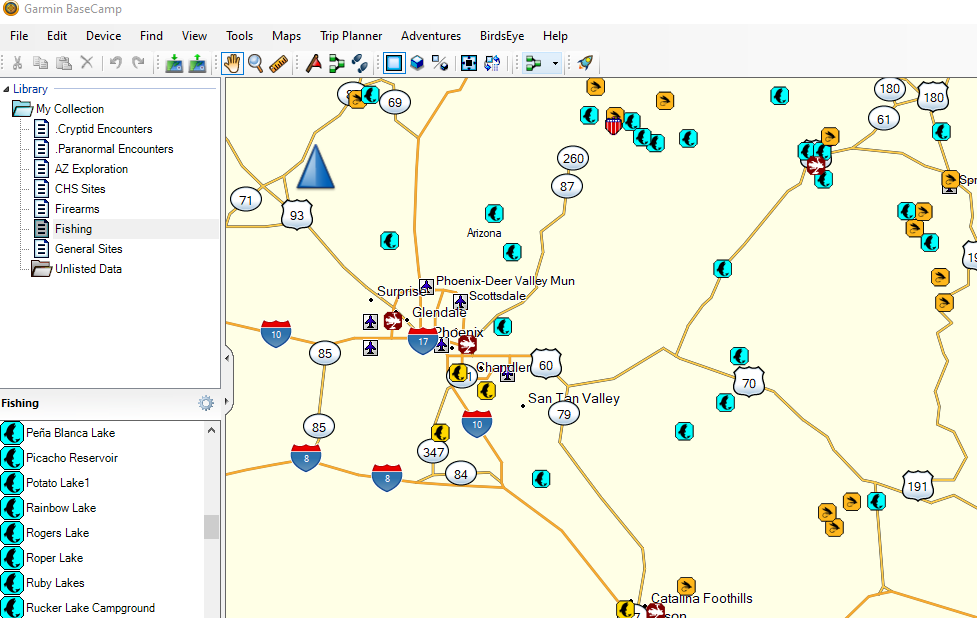
As you can see, this isn’t too difficult, is it? It’s easy and custom waypoints gives your GPS device a great look as well as your Basecamp desktop. As you can see in the example below, we’re looking at my “fishing” folder. The Aqua Green graphic tile I use to mark Bass, Crappie and Catfishing waters. The gold tiles I use to mark Trout waters…

Garmin Basecamp With Custom Waypoint Symbols
Tips for Effective Waypoint Management
- Organize Waypoints: Categorize waypoints by activity or location for easier management.
- Regular Backups: Regularly back up your custom symbols to prevent data loss.
- Use Descriptive Names: Use clear and descriptive names for easy identification.
- Update Firmware: Keep your Garmin GPS firmware updated for the best performance.
Conclusion
Creating custom symbols on your Garmin GPS can significantly enhance your navigation experience. Whether you are hiking, fishing, or exploring new areas, these symbols provide a personalized and efficient way to manage your travels. By following the steps outlined in this guide, you can easily create, manage, and use custom waypoints to make the most out of your Garmin GPS device.

